How to Convert PNG to WebP on Mac
PNG is the familiar choice for transparent graphics, screenshots, and interface assets. It can also be much heavier than the page needs. WebP supports transparency in both lossy and lossless modes, so it can deliver many PNG-style assets more efficiently. ExportForWeb performs the conversion locally and preserves transparency.
When to convert PNG to WebP
Good candidates include product screenshots, transparent cutouts, interface illustrations, and large textured graphics. Tiny icons, flat logos, and highly optimized palette images deserve a comparison first—the original PNG may already be compact.
The important question is not “Is WebP always smaller?” It is “Which file renders this asset correctly at the lowest acceptable weight?”
How to convert PNG to WebP on Mac
- Open ExportForWeb and choose a local destination folder.
- Drop in one or more PNG files.
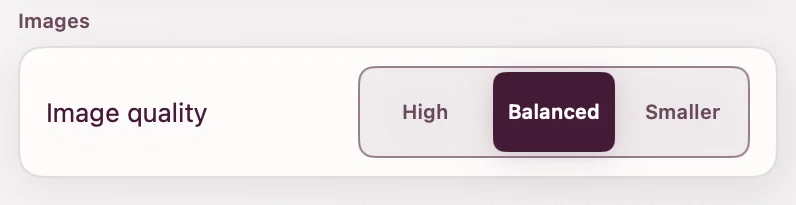
- Select a WebP quality. Balanced is a sensible first comparison; Smaller is useful for heavier screenshots and large graphics.
- Run the batch.
- Reveal the results in Finder and place each WebP over the real page background to inspect its edges.
Orientation and transparency are handled during conversion. Your PNG files remain unchanged.
Transparency survives the conversion
WebP includes alpha-channel support, which means transparent and partially transparent pixels can remain transparent. Google’s WebP format overview describes transparency support in both lossless and lossy modes.
Always inspect semi-transparent shadows, antialiased edges, and glows against both light and dark backgrounds. A checkerboard preview confirms that transparency exists; the actual website confirms that it looks right.
| PNG content | Check after conversion |
|---|---|
| UI screenshot | Small text and one-pixel lines |
| Transparent product cutout | Hair, shadows, soft edges |
| Illustration | Flat color boundaries and gradients |
| Logo | Sharp geometry at every displayed size |
Lossy or lossless thinking
A photographic screenshot may tolerate adjustable lossy compression very well. A sparse interface with tiny type may reveal artifacts sooner. ExportForWeb presents practical quality choices rather than asking you to manage encoder flags; your job is to compare the result in context.
Do not optimize the wrong dimensions. A 3000-pixel screenshot displayed at 700 pixels is carrying unnecessary work before format compression even begins. Size the asset appropriately in the source workflow, then convert it.
Add the WebP to your page
<img
  src="dashboard.webp"
  alt="Dashboard showing weekly export totals"
  width="1440"
  height="900"
  loading="lazy"
  decoding="async"
/>
Intrinsic width and height help the browser reserve space. Use a clear alt description when the screenshot communicates information; use an empty alt="" only when the image is genuinely decorative.
When to keep serving PNG
Keep PNG when it is already smaller, when a downstream tool explicitly requires it, or when the converted result does not preserve the asset to your standard. The original also remains valuable as the editing source even when WebP wins for delivery.
If you need a formal fallback, use <picture>:
<picture>
  <source srcset="dashboard.webp" type="image/webp" />
  <img src="dashboard.png" alt="Dashboard showing weekly export totals" width="1440" height="900" />
</picture>
PNG to WebP questions
Will the background stay transparent?
Yes. ExportForWeb handles PNG transparency when creating the WebP. Inspect complex soft edges on the real background before publishing.
Can a WebP be larger than its PNG source?
Yes. Very small or efficiently encoded PNGs can already be compact, and quality choices affect the result. Compare the files rather than assuming.
Can I convert a folder of PNG files?
You can add multiple selected PNGs and run them as a batch with the same output preference.
[ ABOUT EXPORTFORWEB ]
Quick product questions
Is ExportForWeb free?
Yes. ExportForWeb is a free download on the Mac App Store, and every conversion feature is free to use, with no subscription or paid tier.
Do my files leave my Mac?
No. Conversion happens entirely on your Mac. Your source media and finished exports are never uploaded to us or sent to a cloud conversion service.
What can I export?
Videos become WebM or MP4, with an optional first-frame WebP poster. JPEG, PNG, HEIC, HEIF, TIFF, BMP, and WebP images become WebP.
[ FREE & PRIVATE ]
Make the next export web-ready—privately, for free.
Every feature is free, with no subscription or paid tier. Conversion stays on your Mac, so your media is never uploaded and no account is required.
Download free